Have you ever thought to yourself “What settings should I use on my camera while I am kayaking?” This is especially important to consider with wildlife kayak photography outings, but wonder no longer, help is on the way, in the form of… well… ummm… a blog post. I’ve spent thousands of hours kayaking with cameras, and through trial, error, and common sense, I’ve come up with some basic guidelines to help you configure your camera for those watery voyages,
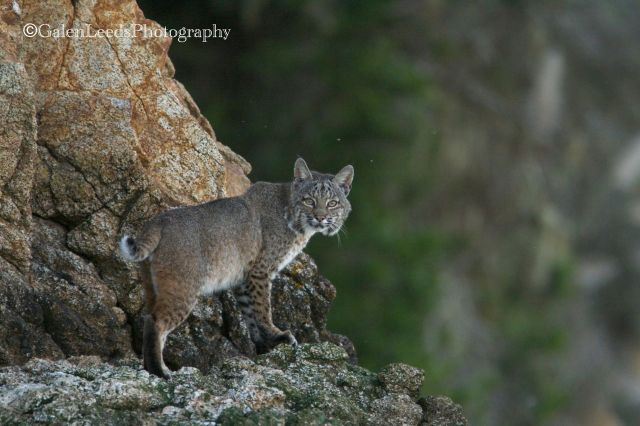
I most often see bobcats (Lynx rufus later in the day, when I am regularly paddling in and out of shadow and the light is changing quickly
Every small wave, shifting of your body, even a slight breeze can rock your kayak a little. Tripods and monopods don’t work too well on these small boats (in fact they only magnify any rocking motion of the boat,) so you will need to compensate. There are a few adjustments that you can make to your camera and settings that work well. The longer your lens, the more important it becomes that you compensate for the small movements of the kayak. Your body will automatically take some of the motion away, but not all of it. Water conditions can really affect the lenses I am using and the settings of my camera.
Shoot faster than you normally would. Increase your shutter speed by at least half a stop (adjusting your aperture or ISO to keep your exposures correct.) You will be shooting your pictures from a slightly less stable platform than you are used to. If you rarely take pictures without a ‘pod, consider increasing your shutter by a full two or three stops. Also, take a test shot or two from time to time if you shoot in full manual mode. Lots of light reflects off of the water, and can help to brighten up your subjects, sometimes allowing you to shoot faster without having to adjust other settings.
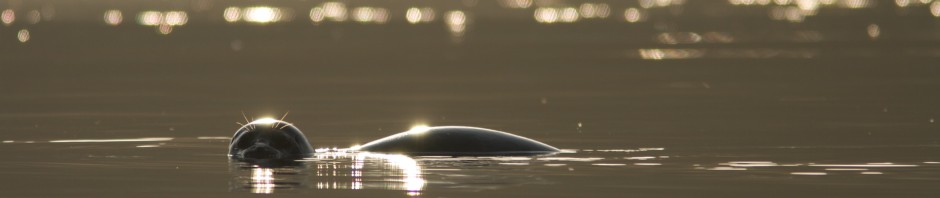
Often times this will mean opening your aperture up wider and/or increasing your ISO. Some of my best pictures of bobcats were near twilight while kayaking. I had my aperture opened up wide to f/5.7 on 420mms of lens, and my ISO set to 800 so that I could get my shutter to 1/500th of a second, which was fast enough to freeze the action in this photograph of a bobcat stalking the shore. There was a some extra noise, but at least the pictures was crisp.
Sometimes it is best to use a shorter length lens than you normally would. If you normally shoot with a 70-200mm lens with a 1.4x converter, consider not attaching the converter if you are not paddling in glassy waters, or if you are feeling less than stable. The extra magnification it provides will get you closer to wildlife, but make it trickier to focus on that same wildlife while bobbing in the water and keep you from snapping a crisp image.
Use a camera or lens that has image stabilization or vibration reduction (pretty much the same thing, but manufacturers like to have their own name for their own doodads.) A built in stabilizer, while adding onto the price of your equipment can make a huge difference when a tripod can’t be used. Many of them even have two modes, one for still shooting, and one for panning. Lots of fun to play with, even off of the water.
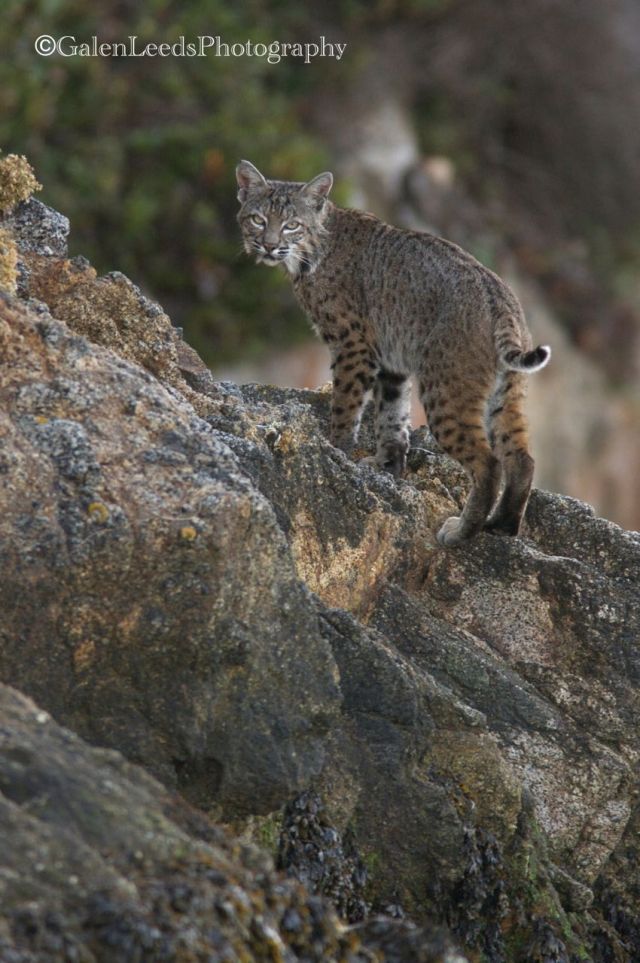
Image stabilization was a great help to keep the lens still enough for this shot
Shoulder stock attachments for your camera can make a great difference in stability during kayak photography or videography. These are fairly simple devices that allow you to brace your camera against your shoulder for extra stability. They make a huge difference, allowing an extra stop or so in shutter speed. I often use them for video work, whether or not I am on a kayak, simply because they help so much. They also allow for smoother panning when following a moving subject. They can be a little awkward at times in a kayak, but well worth it. There are many makes and manufacturers out there. Some appear as simple rifle style stocks, but I prefer the more adjustable styles that use a 15 mm rod system. Polaroid makes a very inexpensive yet effective one, while Genustech makes the most comfortable and stable one I have tried (with some minor modification). The shoulder stock was key in shooting this video of a Least Sandpiper. You can see the extra stbility it gives when shooting hand held.
If your camera allows you to preset for different lighting conditions (my cameras have three user presets for example), get those presets ready before you need them. When you are kayaking, you are able to get 360 degrees of view fairly easily just by paddling in a circle. Know what light you will be using if you go into shadows or face a different direction going around a point, and preset for it. Know what you will do if you are paddling into the sun, but see a bird or seal that is behind you, and needs a different exposure. I will often have one of my presets setup in case I want to switch to video (the settings are so different than what is wanted for stills). The second preset is ready in case I move from sun into shadow, and the third is the reverse of that- from shadow into sun.
The other option to presetting your camera is to use the Time Priority setting on your camera, sometimes labeled Tv or Tp. This is where you set your shutter speed and let your camera compensate accordingly. Shutter speed can be the most important factor much of the time, as mentioned earlier, so if you are not shooting straight M or manual, go for shutter priority. If you set your camera for aperture priority, your camera might compensate by slowing down your shutter speed, something you don’t want.
Some cameras will also allow users to set their ISO to automatic. In this way you can preserve your shutter and your aperture settings as lighting conditions change quickly, but you do run the risk of getting some very noisy photographs from your kayak, if the camera decides it has to bump the ISO settings too high. I usually avoid this setting, except on rare occasions.
Most other functions will depend upon your own personal shooting style. Sharpness, saturation, etc. White balance will depend on the conditions you are paddling under- cloudy, sunny, shady, etc.
While it is best to prepare your camera before heading out, don’t be afraid to change things up as conditions allow. If you are paddling through glassy waters, put that converter back on and pull out that polarizer that you were afraid would slow down your shutter too much. Have fun, play some.
-Galen
The End


I like these tips..they are practical..and ones that I will use. I like shooting in shutter priority when I Know the conditions will change ..but I won’t have time to adjust to the animals move from sun to shade. Many tips for wildlife are too complicated to accomplish on the fly…but your presets make a great deal of sense. Thank you.