Wildlife Kayak Photography: Tips and Tricks


Great Egret on the hunt

Kayaks are an amazing medium for wildlife photography. You are down low, giving an almost eye to eye view with your subjects. You can move in almost any direction, there are no trails you have to worry about stepping off of (although a river or slough could be considered a really wide trail.) There are good views of what is around you, no trees or buildings blocking the views, giving you an idea of where to go and who is around to be photographed. However, due to its nature kayak photography also has some special considerations, many of which can be considered as pros or cons, depending on how you deal with them. I try to make them benefits.

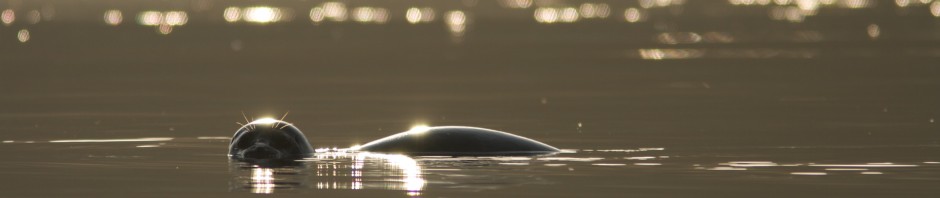
With any wildlife photography it is important to understand that you are seeing wild animals. Their lives are fraught with danger and they don’t understand that we just want to shoot them with a camera and not a gun. They don’t realize we are creeping closer just to see them better, that we won’t suddenly pounce on them and carry them off. They need us to respect them and keep some distance. Stress is harder on them- there are animals that can literally be frightened to death. So please, even though there are no physical obstacles between you and that seal when you are on the water, give them their space. They will fly away or swim away if you approach them incautiously or too closely, losing any chance for that great photo. Also, it is against Federal Law in the U.S. to approach and disturb marine mammals.

Sea Lion surfacing for air and curiosity

That said, there is some good news. It is not illegal for these same animals to approach you, and there are a lot of curious marine mammals out there. If you do give them their space, many times they will actually approach you, because they want to figure out what you are. Otters, seals, dolphins, even whales, can all get very curious and decide to come close enough for some amazing pictures (whichever camera you are using.) Seals especially love to pop up right behind kayaks where they think you won’t see them. Just remember to let them come to you. The Sea Lion to the left, and the Harbor Seal below did exactly that.

A curious Harbor Seal

Compact digital cameras (point and shoots) can be excellent for general photography, but fall shy (usually) on wildlife. You end up with lots of background, but little detail. Kayak photography is no exception. You will have your best chances for stunning and meaningful pictures using a dSLR with a longer lens- 200mm or 300mm often giving the best results. These lengths will help you get close enough for detail, while not being too long to compensate for the bobbing of a kayak. Under the right conditions you can be add a 1.4x or a 2x converter to these lenses.

Keep your camera accessible yet safe (I will be addressing this in Part 2 of Which Camera to Take, and how to keep it safe.) If your camera is packed away in to tricky of a place, you will never use it, because of the ordeal to take it out, or you might miss the magic moment when the whale is next to you.

Marsh Hawk (Northern Harrier) hunting flooded wetlands

First of all, realize that it is generally not ideal to use a monopod or tripod when taking wildlife pictures from a kayak, unless the water is very calm. ‘Pods are made to be on stable surfaces, and a kayak is anything but. Slight movements cause a kayak to shift, causing the camera to shift even more. (Put your elbow on the table in front of you, with your hand up. Move your hand to one side- notice how little your arm moved near your elbow, compared to how much your hand moved? That is what a camera mounted on a tripod is like when kayaking, but even more so.) Image stabilizing cameras and lenses can be much more effective than a ‘pod on a kayak. Also, your body actually works almost as a natural shock absorber and compensator for the movement of the kayak. You will have the steadiest camera if you handhold. It will also be the easiest way to track and pan.

Osprey and fish

Use the wind and currents. Most of the time there will be a wind and/or some current. Figure out what direction you will go if you stop paddling for a while, and use that to approach  and pass wildlife with a minimum of movement. That is, get to a point where the kayak naturally wants to pass by what you want to shoot. Don’t waste all of your energy trying to keep your kayak close to something, when you can set yourself up to pass by them. This is often less frightening to the animal (no paddle waving in the air, just a still unmoving object drifting by,) but it also keeps your hands free for shooting.

Try to make sure you don’t drift right at the animal, aim your path to the side, giving the animal enough room that you don’t frighten it. This will also give you the most angles, and the largest range of lighting. You can’t direct the animal, so direct yourself.

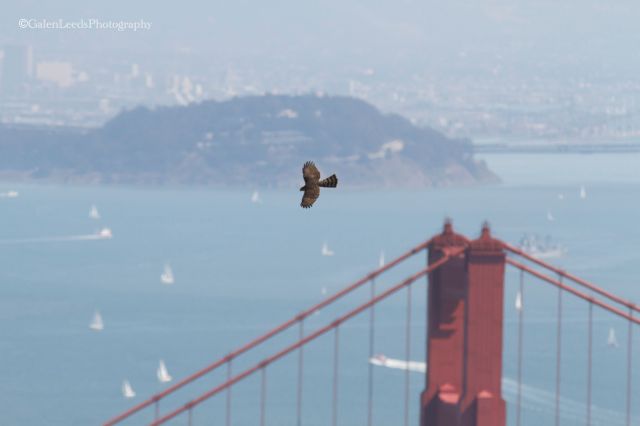
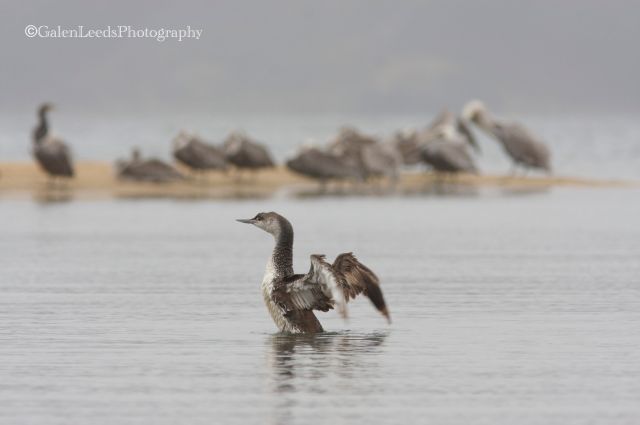
Also, using the kayaks momentum, you can use the kayak itself to pan for your pictures. When a bird is flying by, if you have a rudder (which I highly recommend for kayak photography) you can steer the kayak with your feet, so that you are turning and rotating with the bird as it flies by. You can track it without turning your body, just your kayak. I’ve done this many times with Red-throated Loons and Osprey with fish.

Marsh Hawk with prey

Watch the animals, don’t just take their pictures. This does several things. First, it lets you know if you are frightening the animal and should back off. It can also let you know if you can slowly approach more closely. It can also help you time your images for when the wildlife is doing something exciting or interesting, such as catching a fish. If you understand its behavior, it will be easier to guess when it will be doing something interesting.

Through watching the different birds while kayaking, I now know how closely I can approach different species. Great Blue Herons for instance are a much flightier bird than a Great Egret, and I find myself having to paddle in a huge circle just to pass them by(unless the fishing is really good, then they become so focused that I can glide right by without them ever noticing.) Least Sandpipers on the other hand will pass within feet of me and my beached kayak as they walk along the shore, feeding on bits too small for me to see. Willits and Marbled Godwits are often fairly fearless, as long as they feel you aren’t approaching them too directly. There are many different ways in which time of day or year can also affect which species you will see, in what numbers, and in what plumages. Knowing the species will help with these questions.

Least Sandpiper scrathcing

Take advantage of the fact that you are less than three feet off of the surface of the water. Use this to get images of wildlife from their own perspective. An eye level shot of  a pelican is much more engaging than one from a standing height. I even lean forward or back to get even closer to the water at times for the smaller and shorter of the animals.

You are on water. Water reflects. Include reflections when you can, it can give drama and effect very simply. Also, compensate for the reflected light when you are taking your pictures. Water is 1-2 stops different from the sky, but even more than that, it helps to light the wildlife you are photographing.

Marsh Wren in cattails

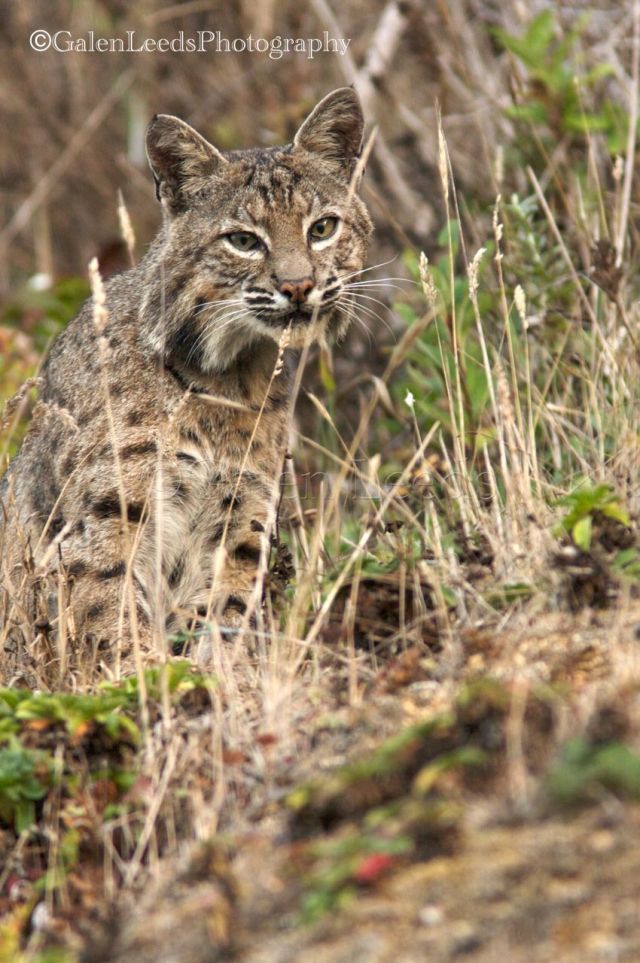
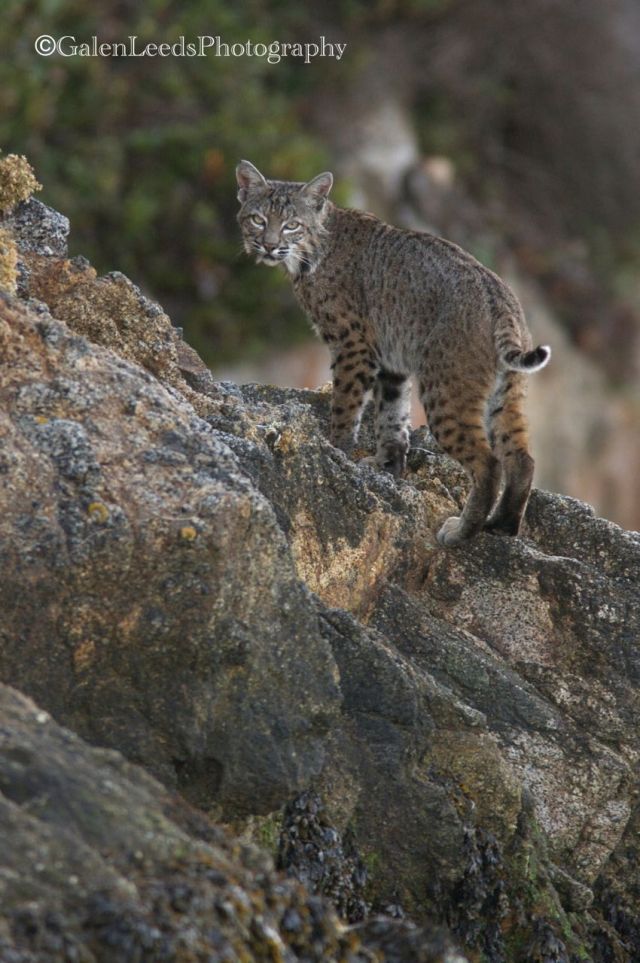
Also, be aware if you are about to kayak through a shady area (under a steep hillside, cliffs, or trees.) Preset your exposure if you are on manual settings, or adjust your exposure compensation if you are shooting on AV or TV. Make sure to fire plenty of test shots before you come across that bobcat walking the shore. You may only have one or two shots before it is gone. If you have custom shooting presets have one set to the light in the shadows, one for looking away from the sun, and one for the sun at your back. Try to plan ahead as much as you can for those surprises.

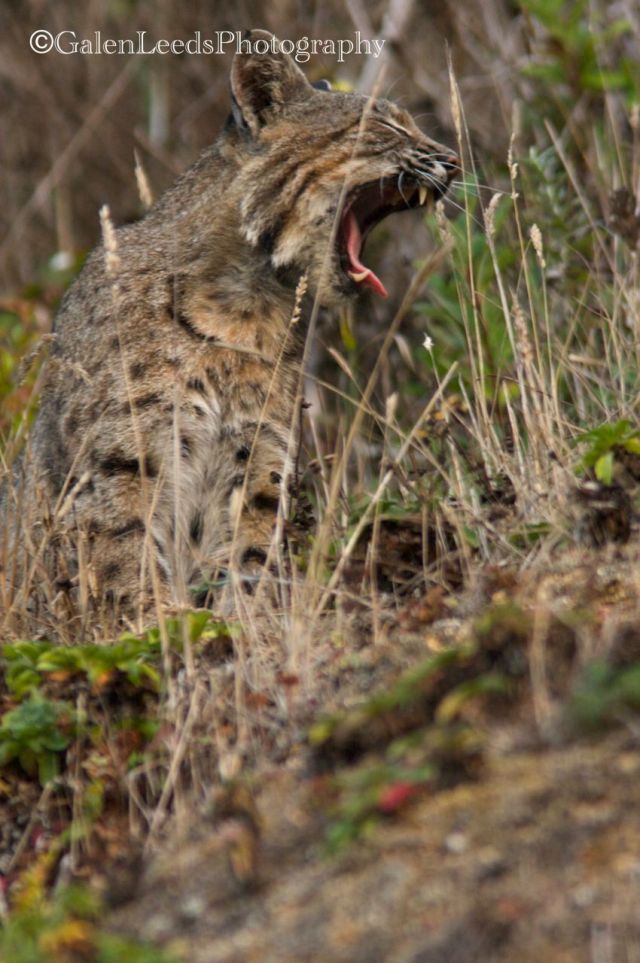
Bobcat on the shores of Tomales Bay. By having my camera ready, and my settings preset, I was ready for this beautiful cat

When I took this picture of a bobcat on the shores of Tomales Bay, I had just paddled into deep late afternoon shadows. I had my camera preset for the shade I was entering, my dry bag was open. This bobcat came out from around the corner of rock, stopped and looked at me. I was able to pull my camera out, take two quick shots, and then it turned around and left. If I hadn’t been ready with a preset camera, the bobcat would have been gone before I could have set the camera and taken a single shot.

Being so low to the water also makes it easy to include some of that water in the image. This can give perspective. It also gives a sense of place and naturalness to the image. What is more natural than a duck on water?

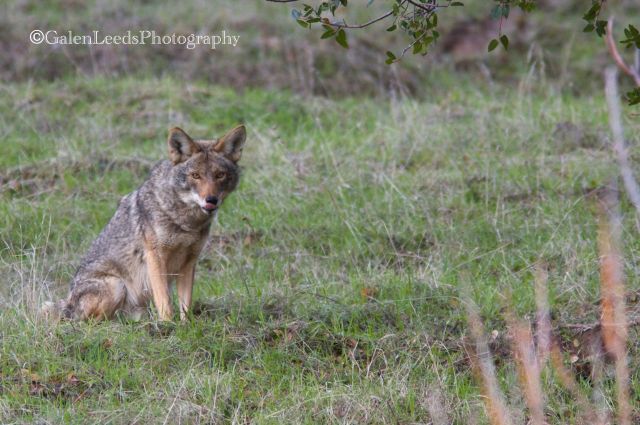
Don’t just look for animals on the water. Look on the immediate shore, but also a little distance onto land. Some of my best wildlife images of raccoons, deer, bobcat, elk, and coyotes all came about while I was kayaking. They don’t necessarily watch the water for dangers and might not notice you if you stay quiet and fairly still. If they do notice you, you are such a different creature from the person that is walking and stomping around, that they generally aren’t as freightened, and can be more curious as to what you may be.

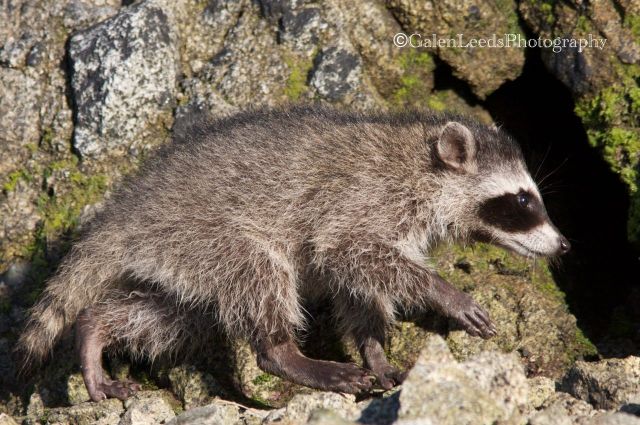
Mother raccoon hunting for crabs at low tide

This mother raccoon on the right I saw very early one morning searching for crabs in the rocks along the shore. I set my kayak to drift by her. She looked up as I passed, before going back to her hunt.

Be quiet and move small. This is true of any wildlife photography. No large sudden movements. When you do have to move, move slowly. Get a small one handed fishing paddle or carry a spare half paddle. My paddle splits in two, and I will often separate the halves and just use one end when I am trying to move small and not spook an animal.

Don’t be afraid to beach yourself if the opportunity presents itself and you have a chance for some good images. Sometimes it is nice not to have to worry about where you are drifting, and if it will take you too far from what you are trying to shoot. Be aware though that this will limit your mobility, and might not always be the most effective.

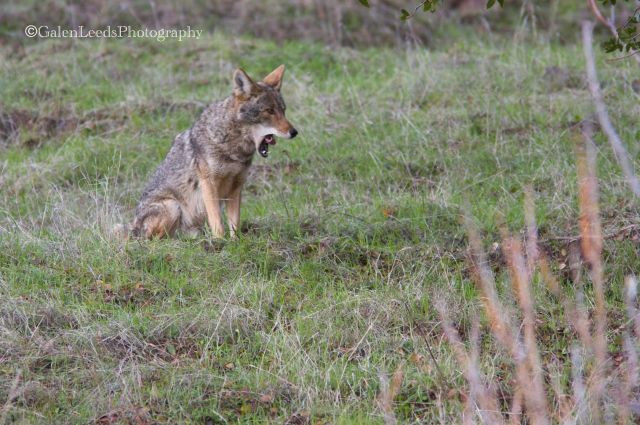
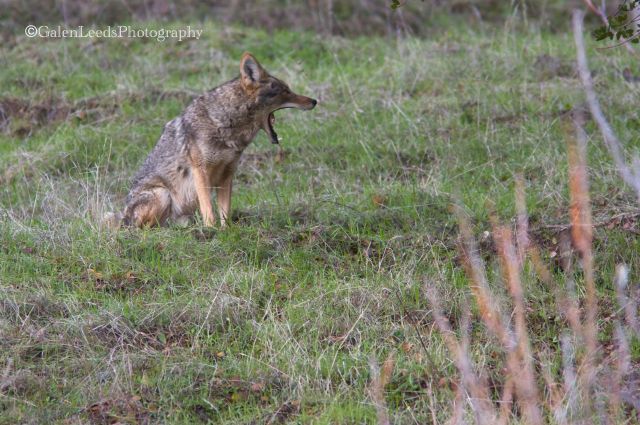
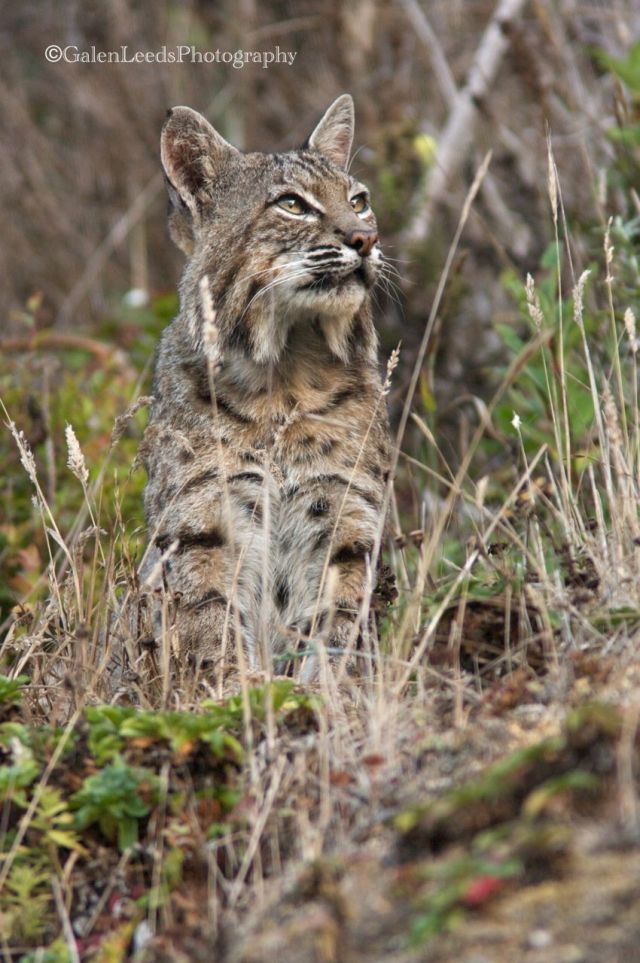
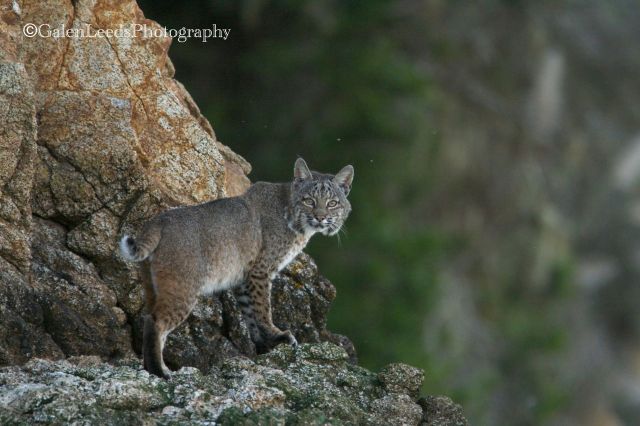
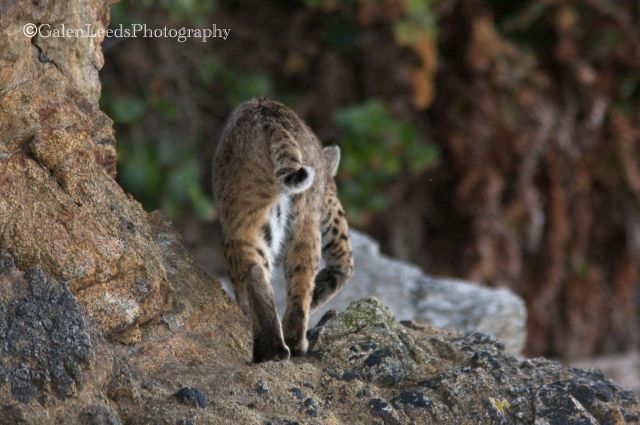
Bobcat stalking the shores at low tide

This is a different bobcat that I saw while I was out kayaking. It was some distance down the coast, but I saw it slowly making its way north. I beached my kayak well ahead of it, and just sat quietly and waited. I sat very quietly and stilly, moving little more than my camera and my finger on the shutter. It was aware of me, passing within a two meters, but as I was very still and unthreatening it merely passed on by before marking its territory and heading off into the brush.

Have large memory cards. You don’t want to swap out your memory very often while kayaking, or when taking pictures of wildlife. This also helps to simplify things. There is enough to think about already, that it is good to keep things simple when you can.

There is more. So much more, but this is enough for now. Keep shooting, paddling, and reading, and I will keep passing on tips, like what to bring in your kayak besides your camera.

-Galen

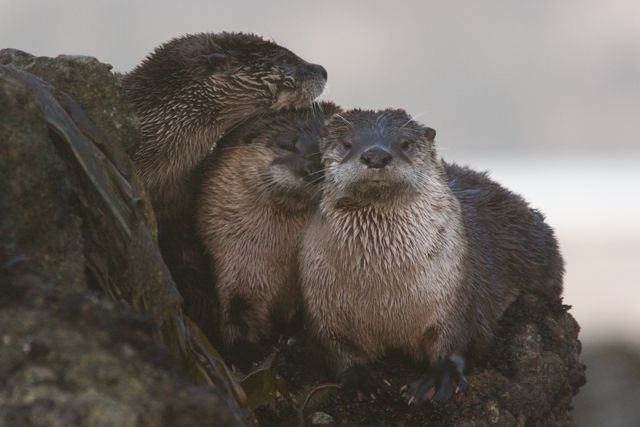
River Otters pausing in the shallows to watch me, as I watch them

Posted in birds, kayak photography, marine life, nature photography, photography, wildlife photography | Tagged , , , , , , , | 66 Comments

My spot on the local NBC show OpenRoad


I would like to share with everyone the interview I did recently for the NBC show OpenRoad with Doug McConnell, where Doug asks me about kayak photography. It’s a fun little spot, and I hope you all enjoy it.

Here’s my spot- Galen’s interview

P.S. If any of you ever watched a show from several years back called “Mac and Mutley,” about an adventurous guy and his travels with his dog, Doug is “Mac.”

Posted in photography | 4 Comments

Once in a lifetime experience


I had one today, while I was sitting alone out in a field over looking some tidal wetlands, working on a timelapse photography project. I heard some footsteps in the grass behind me, and it turns out I had a hungry visitor. I guess I had been sitting as still as death, because it thought I was lunch. Here’s a teaser video, as I work on the editing-

Posted in nature, turkey vulture, videography, wildlife | Tagged , , , , , , , | 10 Comments

Remembering old friends: A virtual visit to some of my favorite National Parks


They’ve been there my whole life, waiting for me to get to know them. And everyone I’ve come across, I’ve been amazed by in one way or another. Today, as they shut down, my thoughts wander to our national parks… they are like friends and family, waiting for us… until the government shutdown put them out of commission. I realize there are further ranging effects than this temporary loss of our National Treasures, but I don’t want us or any visitors to our land to have to do with out them. This post therefore is an homage to National Seashores and Parks, that I hope we will not be barred from for very long.

The fog shrouds this beach scene in a moody quietness that wouldn't be there on a sunny day

The fog shrouds this beach scene in a moody quietness that wouldn’t be there on a sunny day

As I scroll through my photographic archives, I notice that a majority of my images were captured while in one national park or another. I am amazed at the variety and depth of the park system, and I have only visited a small percentage of the 401 nationals. I am thankful that this shutdown does not affect our state and local parks, since I do not know what I would do without at least those connections with our natural world.

In the meantime, enjoy these photos and this virtual visit to parks around the nation, which is my way of celebrating the existence of these wonderful resources.

Valentine's Cave, Lava Tubes National Monument, Ca.

Valentine’s Cave, Lava Tubes National Monument, Ca.

And to the 21,000 national park staff who have been furloughed with out pay, I just want to express my thanks for the hard work that you do protecting and sharing our national heritage. I hope we do not have to be long without your services. You would normally be helping as many as 715,000 of us each day to enjoy our parks. Apparently we can’t do this without you.

I found this trio of otters late one afternoon. Point Reyes National Seashore, Ca.

I found this trio of otters late one afternoon. Point Reyes National Seashore, Ca.

Lava Tubes National Monument, Ca.

Lava Tubes National Monument, Ca.

While I enjoy the texture of sunlight on the dunes, the presun light is also magical at the Eureka Sand Dunes, Death Valley National Park, Ca.

The Eureka Sand Dunes, Death Valley National Park, Ca.

Cactus of Death Valley National Park, Ca.

Cactus of Death Valley National Park, Ca.

Raven Tracks in the Eureka Sand Dunes, Death Valley National Park

Raven Tracks in the Eureka Sand Dunes, Death Valley National Park

Backpacking the rocky slopes of the Stanislaus National Forest, California

The rocky slopes of the Stanislaus National Forest, California

Cooper's Hawk migrating over Hawk Hill in the Golden Gate National Recreation Area

Cooper’s Hawk migrating over Hawk Hill in the Golden Gate National Recreation Area

The Wright Brothers' National Monument, NC- the very first powered flight occurred here.

The Wright Brothers’ National Monument, NC- the very first powered flight occurred here.

Low tide in the Point Reyes National Seashore, California

Low tide in the Point Reyes National Seashore, California

Lava Beds National Monument, California

Lava Beds National Monument, California

Red-throated Loon rising up in Tomales Bay, along the shores of the Point Reyes National Seashore, Ca.

Red-throated Loon rising up in Tomales Bay, along the shores of the Point Reyes National Seashore, Ca.

The wild ponies of Shcakleford Bank in the Cape Lookout National Seashore, North Carolina

The wild ponies of Shcakleford Bank in the Cape Lookout National Seashore, North Carolina

Volcano National Park, Hawaii

Volcano National Park, Hawaii

Re-enacting the very first flight of the Wright Brothers at their national monument in Kill Devil Hills, NC

Re-enacting the very first flight of the Wright Brothers at their national monument in Kill Devil Hills, NC

Glacial polish on the granite slopes of the Stanislaus National Forest

Glacial polish on the granite slopes of the Stanislaus National Forest

Schoodic Point in the Acadia National Park

Schoodic Point in the Acadia National Park, Maine

Wildlife of Acadia National Park, Maine

Wildlife of Acadia National Park, Maine

The ancient twisted Mountain Junipers of the Stanislaus National Forest

The ancient twisted Mountain Junipers of the Stanislaus National Forest, California

Bobcat stalking the Shores of the Point Reyes National Seashore

Bobcat stalking the Shores of the Point Reyes National Seashore

Posted in My favorite Parks, National Park, nature photography, photography, wildlife photography | Tagged , , , , , , , , | 16 Comments

Translating between photography and video: shutter speed and more


As DSLRs become more capable of recording high quality video, it is harder and harder to resist the allure of moving images. And why shouldn’t it be? If a picture is worth a thousand words, and 1 second of video is comprised of 24 images in a single second (or 30, 48, 60, or more images per second), then a single minute of video could be equal to 1,440,000 words or more… although I think reality in this case is likely to be less linear than the math.

I am still actively shooting stills, but I have been enthralled by what I can now also do with video. It is a fantastic tool for showing added dimensions to animal behavior, for showing scale of movement versus just movement, especially of things that aren’t wholly visible like wind (If you show a still of a leaf blowing in the wind, how is the viewer to know if it is a gentle breeze or a gale? Somethings will be expressed through context, but some of the story will still be missing.) Video, while it has its own limitations can fill in some of the gaps, and is also interesting in that it can make photographers approach situations in different ways, especially if they are trying for both stills and footage.

Much of my free time lately has been spent working on these new skills, and trying to find a balance between photography and movie making. Unfortunately this has eaten into my blogging time, but now, as I become more comfortable with the moving picture capabilities of my camera, I will hopefully be able to find time once again to share with all of you.

As I’ve been begun to shoot short movies, I’ve had to adjust my thinking about my camera’s functions in several ways. Composition for example is still very important, but with photography you are composing for a single moment, while with a movie you are composing for a whole series of moments, in which the world may or may not be static. What you are shooting might be moving… or you might be moving, as you pan, walk, or dolly. This is actually great practice for photographers, as we set up for the composition of that moment, but it helps us plan for our future shots as we shoot stills of wildlife or people.

Composition is only a single component of the differences though. Camera settings change in varied ways, some of which can seem almost counter intuitive to someone that has only shot photos. While shutter speed, aperture, and ISO have the same operation, their practice is rather different. When shooting wildlife photos, you often want to bump your shutter speed to a high enough point that you will have a crisp image frozen in time (I know, I know, sometimes you also want motion blur), while with movies ideal shutter speed is usually within a stop of 1/60th. A nearly unthinkable speed for a wildlife photographer. Shutter speed should generally be twice the frame rate you are shooting at (don’t worry, frame rate will be an upcoming post, but I don’t want to make this one too long or involved, and it’s already heading that way). Most common frame rates are either 24 or 30 frames per second, hence the 1/60th.

Such a slow shutter speed isn’t as scary as it sounds, because camera shake and movement have a whole different meaning. If you are shooting several seconds, or even minutes of video, bumping up your shutter speed isn’t going to hide it, because every movement of your camera will be captured. Whether that movement is a pan or camera shake, it will be captured over the course of several seconds. Changing speeds won’t matter, the movement will still be there. If you bump the shutter speed up much, it will make for a very stuttered scene, that does not have a smooth flow. The footage will seem choppy, because the frame rate and the shutter speed are too far out of alignment. The object being filmed will have moved so much farther in the time between two 1/400th of a second photographs, than it will have moved in that 1/24th or 1/30th of a second space (because of frame rates) that it is supposed to fill.

Here’s a short movie I made recently for a local farm. It has a lot of examples of different types of movement in it. The shutter speed is a consistent 1/60th of a second. Is the shutter speed noticeably that slow? No. Is camera movement apparent? Yes.

Food for thought- If shutter speed remains more or less constant, what does that mean for aperture and ISO as you adjust them for noise and depth of field? I’ll be addressing those in upcoming posts. In the meantime, happy shooting.

Posted in How To, photography, SLR, video, videography | Tagged , , , , , , | 5 Comments

How to photograph fireworks


Just realized that it’s about time to repost this one…

It’s actually pretty easy to get the technical parts right, when taking pictures of fireworks, which means the important part is to think ahead and decide where you want to be in relation to the firework display, and what else you will want in your photograph.

I learned how to photograph fireworks, well, ummm… two days ago on the fourth of July, and it only took a simple web search and a few minutes of reading. Here is what I learned, but simplified.

1. Use a tripod. Your exposures will be 1-15 seconds long. You need to keep your camera still. Use a remote shutter release or your camera’s timer.

2. If you have the option to set your ISO, set it between 100 and 400. (Many of the articles I read in my search said 100, but I found I prefered 320 so that I could have a faster shutter speed.)

3. If you can set your aperture, set it between f8.0 and f16. This gives a good depth of field, without slowing down the shutter speed to much.

4. Turn off your autofocus if you can and focus on infinity. If you can’t, try to focus on a point near where the fireworks will be and lock your focus on that.

5. Set your shutter speed between 1 second and 15 seconds. The length of the shutter speed should depend on bow many bursts you want in the photograph at one time. The longer the exposure, the busier the image. The shorter the exposure, the more you are focused on just one or two explosions.

6. Start taking the picture when you see the firework launch. Your exposure is long, so it will catch all the action you want and more.

That covers most of the technical aspects. You should also think about what lens to use. If you are close to the fireworks, use a wide lens. You won’t be able to track the rockets very easily, so you will want to improve your chances by photographing more of the night sky. When I took my photos, I was mostly using a 70-200mm because I was farther away, and my only other lens I had brought was my 16-35 mm. The lens I wish I had brought was my 24-70 mm, which would have given me a little more of the boats and water, while still capturing the action.

Happy shooting,

Galen

Posted in photography | Tagged , , , , | 6 Comments

Anatomy of a photo #86: Coyote tongue


This is a continuation in my series of catching animals having a little slip of the tongue… or in some cases, like this one, a not so little slip. This is not about showing close up detailed images of animal tongues, but rather just catching them in the act of life. It all started when reviewing photos, and realizing how many images I had of animals showing their tongues, sometimes captured on purpose (such as here) and other times not realizing it until I arrived home and began reviewing images. I’ve found that catching them in a yawn can be a great time to see that bit of pink, this coyote being a great example.

This was the first image I captured in this mini-series. Almost felt like I was being sized up for breakfast with the lip licking

This was the first image I captured in this mini-series. Almost felt like I was being sized up for breakfast with the lip licking

I came across this sleepy coyote (although there is nothing sleepy about the eyes) while waiting to explore the Hazel-Atlas Sand Mine, a now defunct mine where they excavated first coal and then sand (for making ketchup bottles and in foundries) in the 1920’s, on the other side of the bay from San Francisco. (You can see photos from within the mine, which is rather an interesting place here.)

It almost makes you want to join in with your won yawn

It almost makes you want to join in with your own yawn

There were several other coyotes around that I also got some nice images of, however, since none of them showed off their tongues, they don’t get to be a part of this little series. The land above the mines is beautiful- vast rolling hills in a 600+ acre park, carving out a space of quiet within sight of San Francisco Bay. Lots of history to explore, but even better lots of wildlife.

This image always puts me in mind of the old time lion tamers putting their heads into the lions mouth. Amazing how wide the jaws can spread in a yawn

This image always puts me in mind of the old time lion tamers putting their heads into the lions mouth. Amazing how wide the jaws can spread in a yawn

Well, it’s time to head out and see what the day has to offer, so enjoy yourselves.

Posted in Anatomy of a photo, coyote, My favorite Parks, nature photography, tongues, wildlife photography | Tagged , , , , , , , | 14 Comments

Kayak photography video


I spend a lot of time kayaking, exploring, and photographing the natural world. Motorless boats, cameras, and nature all go so well together- gliding silently along, with only the murmur of the paddle to interrupt the songs of the myriad birds, slipping along as just another shadow, observing and capturing moments of calmness and clarity. Of course, it’s not always calm, peaceful bliss, but I like to imagine that it is, and so that is what I am sharing with all of you, some of that stillness of nature that I actually do find most of the time that I am out there… the calm beauty that nature can be.

My most common (yet by no means only) place that I get to explore and share is Tomales Bay, a beautiful yet rugged place in Northern California. It is a fantastic area to explore with a rich and varied ecosystem that supports a huge diversity of life. I am often amazed at how much life there is in its waters and along its shores.

This is a little project that I just finished up for something else, and I had a lot of fun making it. I’ve decided to share it here, since it shows a bit of what I do, and why I do it. Hope you all enjoy it.

Posted in How to, kayak photography, nature photography, video, wildlife photography | Tagged , , , , | 32 Comments

The ethics of disclosing where photographs were taken


I spend a lot of time on public lands and waters, where I see many amazing and delightful things. I photograph them and share them with others. It is not uncommon for people to say, “Wow, where was this taken?” In some cases, I might be very specific or give a general locale, but there are times when I might be loath to announce exactly where I have taken a photograph. Some of the reasons are ethical, some a sense of preservation, and some… a little more selfish.

Wildlife

I won’t disclose the location of bird nests or animal dens that I come across. This, for me, is an ethical one. If people learn of these sites, they may get drawn- with no harm intended- to try and catch a peek of these animals and they’re young. Even with the best of intentions, this can drive adults away, causing them to abandon eggs or young.

Spending too much time near these areas where young animals are, can get the young too used to people, can make them less cautious than they should be. Part of the beauty of wild creatures is that they are wild.

I will give general locations of animals, where people can come across them while they are out and about, but I try not to reveal specific locations that are important to their life needs. I might say “I often see Bobcats while kayaking on Tomales Bay.” I won’t say, “If you paddle to the second cove past the big rock (I’m making up these directions), you’ll find an otter den with several pups.”

20130208-134546.jpg

I won’t reveal where I came across this mother weasel hunting for its young. Sorry.

Landscapes

Some locations I proudly announce the name of when I display my photographs. In fact, I would say this is the norm rather than the exception, especially with landscapes. People will often feel more of a connection with a picture, if it is of a place they are familiar with. It’s good PR and business sense to tell locations, because it offers that connection. If someone wants to go to the same spot and take one’s own version, fine. It won’t be the exact same picture, because of differences in composition, weather, and lighting. We all see things differently, and our photographs will often show those differences. If someone goes to the area, and they just aren’t satisfied with their own images after seeing yours, that’s fantastic. You’ve just reinforced in their minds what a good photographer you are. If you’re afraid of competition, then perhaps you’re not doing everything you could to make the images you want.

I’ll also tell or display where landscapes were taken because I want to inspire people to go out and visit their local parks. They are there for all of us, and the more we use them and show our support of them, the more likely it is that more parks will be created, preserving more habitat and beauty, whether it is on the municipal, county, state, or federal level. Also, the more attention our parks get, the more likely it is that they will continue to get funded. Here in California, when the budget has problems, it is often the parks that get hit first. Some of my favorite parks have been shut down, and others are now only open on weekends.

What will stop me from disclosing an exact location, is when an influx of people will change the character of a place, threatening the habitat or environment. Part of taking pictures of beautiful places is preserving them. While I want to promote my parks, I don’t want them to become over run.

Finally, there are a few areas I don’t share, simply because I know they are places where I know I can find a quiet spot to rest and get away from it all when I need to- places that are special to me. I have spots I’ve been going to for years, where I’ve never come across another person, even though they are on public land. I don’t want that to change.

Sometimes it can be tricky balancing the sharing of a place with protecting it. Sometimes I feel somewhat selfish, but I feel it is the wise choice to err towards protecting important places in the end.

20130208-134644.jpg I’ll happily let everyone know that I photographed this old railroad bed just north of the town of Point Reyes, on Highway 1. Stop at the first dirt turnout when the bay comes fully into view, and you’ll find a trail leading down the hillside. With this photo, I help give people a sense of the history and nature of the place. When I give more information, it gives the photograph more meaning.

Posted in ethics, Location, nature photography, photography, wildlife photography | Tagged , , , , , , , | 23 Comments

Why I don’t use Photoshop


I don’t know how to use Photoshop anymore, and I’m pretty happy that way, since I don’t really feel much of a need for it. Back when I did have it, I only used it for three things: making signs, making business cards, and creating a watermark that I could put on my images.

Most of the fancy post production tricks don’t fit my style of photography- removing unwanted objects from the images, adding that special gleam of light to an animals eye, adding other elements that weren’t there… It just doesn’t fit. I have nothing against Photoshop, but it’s not part of my world view or my photographic view.

If you see a gleam in the eye in my photos, it's because I waited until I saw it there naturally, and I positioned myself to the light

If you see a gleam in the eye in my photos, it’s because I waited until I saw it there naturally, and I positioned myself to the light

I consider myself a documentary photographer. That is, I am documenting the world around me. Be it an animal, a landscape, an event, or a person- I will try to give my most honest interpretation of what I see through the lens, nothing added, nothing taken away. I might pull a few blades of grass that will interfere with the view, but I do that before the shutter clicks, and I will not manipulate or pose the scene in other ways.

I do perform some minor manipulation on my computer, but I don’t see the need for fancy software. I may adjust the brightness or my exposure when I get home, if the image was a little light or dark. I may shift the white balance to correct the color more closely to what I saw, but I don’t try to add saturation to the images or shift the color into unreal realms. If I am giving my audience a picture of the natural world, I want it to be close to a real and natural state as possible with a photograph.

I likely do less than what many photographers of old did in the darkroom, but I still perform some processing that can be equated to the wonders created in those chemical dens. It doesn’t mean I am more or less of a photographer than those who Photoshop, it just means I am less of a Photoshoper.

I have no problem with people getting creative with their pictures, creating new images, new fantasies, but I consider manipulated images to be in a different genre. They are not documenting the world around them, even if they are giving a new version of the world. Photoshop is proper in its place, as my pictures are in theirs. If I am showing the realities of nature, I believe it is best to stay real. If you are submitting images to a nature magazine, it is likely that they feel the same.

Happy shooting,

-Galen

Posted in documentary, ethics, nature photography, photography | Tagged , , , , , | 46 Comments

Anatomy of a photo #85: Bobcat tongue


I realized it had been a while since I had posted a photo of animals caught in the act of sticking out their tongues, something which seems to happen in a surprising amount of my photographs. These photographs are not close ups of the animal tongues, as I think that is beyond what I and my lenses can accomplish with wild animals at this point, but rather this mini series is of animals and how they can have a slip of the tongue in their day to day lives.

Bobcat caught mid yawn, with its tongue curling

Bobcat caught mid yawn, with its tongue curling

I came across this particular Bobcat (Lynx rufus) a bit earlier in the day, as it was stalking the shores of Tomales Bay in search of prey, and it had boldly strode past me and my kayak as we were nudged against the shore. It had gone its way, as had I, after we had finished our impromptu photo shoot.

I paddled on, photographing nothing of particular interest for the next 45 minutes, when a little farther down the bay I came across the same Bobcat (or so I presume from the markings). It was just climbing onto a small bluff that was perhaps four to five meters above the water, and there it sat down to survey its territory and relax a little, even though it knew I was there.

I know the cat could see me, but it still seemed relaxed

I know the cat could see me, but it still seemed relaxed

Since he (I had seen the proof earlier) seemed rather unconcerned with me floating there below, I decided to take some portraits. I used a 300mm lens, with a 1.4x converter. The lens had built in image stabilization, which was a very good thing, as the sun had just set, and I could not use a very high shutter speed. I had to bump the ISO up to 1000 in the waning light (I figured with all the spots , the grasses, and the varying depths of field the noise might not be too noticeable, as long as I exposed it properly), and with a wide open aperture of f/5.6, I was able to shoot at a shutter speed of 1/250th. Not too bad for 420mm of lens hand held on a kayak. I took many shots, and some of them were definitely a little too blurred to use (which is part of why I took many photographs, as I knew that under the conditions several would be mushy).

I love this shot (That's a good enough caption, right?)

I love this shot (That’s a good enough caption, right?)

I’ve never seen a Bobcat look so peaceful and contemplative as on this evening, when I was lucky enough to be able to sit and watch it, as it sat and watched the fading light of the day. I felt as though it was giving me a window into its life, and sharing a little peace with me. It yawned twice, as it sat up there, and it was during those big cat yawns that I was able to capture those moments when its tongue curled up from between its teeth, allowing me to increase my series of animal tongues by one more species. Other species that I’ve posted tongue images of include Tule Elk, North American River Otter, Sea Lion, White-tailed Kite, and Song Sparrow. I have many more species to add to this series, whose tongues I have already photographed, and of course, as I photograph more species, I will be sharing those as well.

Enjoy

Posted in Anatomy of a photo, bobcats, kayak photography, nature photography, Photo Essay, photography, tongues, wildlife photography | Tagged , , , , , , | 20 Comments

Anatomy of a photo #84: Faux Fringing a sheep


I remember well (although apparently not well enough) reading an article by Galen Rowell (yes, the other Galen) about how he was able to create a diffraction fringe around a fellow climber and his ice axe. It’s a fantastic photograph, his friend standing majestically off in the distance atop a rock jutting out into space, and this line of pure light encircling him. (I don’t have the rights to this image, but a quick web search should get it for you.) And I thought to myself… What a wonderful natural phenomenon to capture. And it’s tickled away in the back of my mind over the years, since I read his article. And over the years, apparently I’d forgotten one of the key factors that is apparently needed to recreate this effect. And no, I don’t mean that I’ve forgotten to carry a mountain climber and an ice axe with me wherever I go. What I’d forgotten is that you need exceptionally clear air in order to allow the light to diffract and bend around the subject in a coherent (visible) way, and you are ideally some distance below your subject.

Yesterday at sunset I did however manage to falsely recreate this effect with a sheep. It turns out all I’ve ever needed was a subject that was fuzzy (or wooly) enough, so that the fuzz could get lit up by the sun and I could pretend that I was diffracting the light around the subject (although this is also a form of diffraction, except that light is having to pass through something solid, instead of simply curving through air).

Position the sun so that it is blocking your sheep. I mean subject.

Position the sun so that it is blocking your sheep. I mean subject.

So to break down faux fringing for you. Get yourself a fuzzy subject. A sheep is ideal, although cows can work keep in mind that fuzzier is better… maybe one of those scottish highland cows… Next, get your subject silhouetted against the sky as the sun is going down. Place yourself a proper distance from your subject so that its body will just block out the entire sun. This will likely be forty to sixty feet away, although it will depend on the size of the sheep. Adjust your aperture and shutter speed so that your subject is a silhouetted shape and so that the sky is not blown out. In the case of the above photograph, I had the aperture set to f/9 and the shutter speed was 1/2500 (all of this at ISO 320). You will get similar effects, even at apertures that are stopped down farther, as long as you adjust your shutter speed or ISO accordingly.

Notice that it is the wool itself that is lit up, that it is not simply a line of light encircling the subject

Notice that it is the wool itself that is lit up, that it is not simply a line of light encircling the subject

Here is a cropped down version, so that you can see the wool more closely. Observe that this is not a true “diffraction fringe.” Fuzz was required.

Posted in Anatomy of a photo, How To, nature photography, photography, road side | Tagged , , , , , , , , | 9 Comments

Camera settings for kayak photography


Have you ever thought to yourself “What settings should I use on my camera while I am kayaking?” This is especially important to consider with wildlife kayak photography outings, but wonder no longer, help is on the way, in the form of… well… ummm… a blog post. I’ve spent thousands of hours kayaking with cameras, and through trial, error, and common sense, I’ve come up with some basic guidelines to help you configure your camera for those watery voyages.

I most often see bobcats (Lynx rufus later in the day, when I am regularly paddling in and out of shadow and the light is changing quickly

I most often see bobcats (Lynx rufus later in the day, when I am regularly paddling in and out of shadow and the light is changing quickly

Photographing from a kayak is not the same as shooting from dry land. Every small wave, shifting of your body, even a slight breeze can rock your kayak a little. Tripods and monopods don’t work too well on these small boats (in fact they only magnify any rocking motion of the boat,) so you will need to compensate with how you hold your camera, and by setting your camera up properly. There are a few adjustments that you can make to your camera and settings that work well. The longer your lens, the more important it becomes that you compensate for the small movements of the kayak. Your body can take some of the motion away, but not all of it. Water conditions can really affect the lenses I use and the settings of my camera.

Shoot faster than you normally would. Increase your shutter speed by at least half a stop (adjusting your aperture or ISO to keep your exposures correct.) You will be shooting your pictures from a slightly less stable platform than you are used to. If you rarely take pictures without a ‘pod, consider increasing your shutter by a full two or three stops. Also, take a test shot or two from time to time if you shoot in full manual mode. Lots of light reflects off of the water, and can help to brighten up your subjects, sometimes allowing you to shoot faster without having to adjust other settings.

Often times this will mean opening your aperture up wider and/or increasing your ISO. Some of my best pictures of bobcats were near twilight while kayaking. I had my aperture opened up wide to f/5.4 on 420mms of lens, and my ISO set to 800 so that I could get my shutter to 1/500th of a second, which was fast enough to freeze the action in this photograph of a bobcat stalking the shore. There was a some extra noise, but at least the pictures was crisp. I’ve lost other photographs of bobcats while kayaking because of too much blur. Better to shoot a little faster and make sure you get that shot, because chances are, you won’t get that many of them.

Sometimes it is best to use a shorter length lens than you normally would. If you normally shoot with a 70-200mm lens with a 1.4x converter, consider not attaching the converter if the water is a little choppy, or if you are feeling less than stable. The extra magnification it provides will get you closer to wildlife, but make it trickier to focus on that same wildlife while bobbing in the water and keep you from snapping a crisp image.

Use a camera or lens that has image stabilization or vibration reduction (pretty much the same thing, but manufacturers like to have their own name for their own doodads.) A built in stabilizer, while adding onto the price of your equipment can make a huge difference when a tripod can’t be used. Many of them even have two modes, one for still shooting, and one for panning. Lots of fun to play with, even off of the water.

Image stabilization was a great help to keep the lens still enough for this shot

Image stabilization was a great help to keep the lens still enough for this shot

Shoulder stock attachments for your camera can make a great difference in stability during kayak photography or videography. These are fairly simple devices that allow you to brace your camera against your shoulder for extra stability. They make a huge difference, allowing an extra stop or so in shutter speed. I often use them for video work, whether or not I am on a kayak, simply because they help so much. They also allow for smoother panning when following a moving subject. They can be a little awkward at times in a kayak, but well worth it. There are many makes and manufacturers out there. Some appear as simple rifle style stocks, but I prefer the more adjustable styles that use a 15 mm rod system. Polaroid makes a very inexpensive yet effective one, while Genustech makes the most comfortable and stable one I have tried (with some minor modification). The shoulder stock was key in shooting this video of a Least Sandpiper. You can see the extra stbility it gives when shooting hand held.

If your camera allows you to preset for different lighting conditions (my cameras have three user presets for example), get those presets ready before you need them. When you are kayaking, you are able to get 360 degrees of view fairly easily just by paddling in a circle. Know what light you will be using if you go into shadows or face a different direction going around a point, and preset for it. Know what you will do if you are paddling into the sun, but see a bird or seal that is behind you, and needs a different exposure. I will often have one of my presets setup in case I want to switch to video (the settings are so different than what is wanted for stills). The second preset is ready in case I move from sun into shadow, and the third is the reverse of that- from shadow into sun.

The other option to presetting your camera is to use the Time Priority setting on your camera, sometimes labeled Tv or Tp. This is where you set your shutter speed and let your camera compensate accordingly. Shutter speed can be the most important factor much of the time, as mentioned earlier, so if you are not shooting straight M or manual, go for shutter priority. If you set your camera for aperture priority, your camera might compensate by slowing down your shutter speed, something you don’t want.

Some cameras will also allow users to set their ISO to automatic. In this way you can preserve your shutter and your aperture settings as lighting conditions change quickly, but you do run the risk of getting some very noisy photographs from your kayak, if the camera decides it has to bump the ISO settings too high. I usually avoid this setting, except on rare occasions.

Most other functions will depend upon your own personal shooting style. Sharpness, saturation, etc. White balance will depend on the conditions you are paddling under- cloudy, sunny, shady, etc.

While it is best to prepare your camera before heading out, don’t be afraid to change things up as conditions allow. If you are paddling through glassy waters, put that converter back on and pull out that polarizer that you were afraid would slow down your shutter too much. Have fun, play some.

-Galen

The End

The End

Posted in bobcats, How To, How to, kayak photography, nature photography, photography, wildlife photography | Tagged , , , , , , , , | 4 Comments